
Any questions unanswered?
Let's discuss them


Many software projects fail not because the idea behind it is weak, but because requirements shift, communication breaks down, and budgets and timelines spiral out of control. We’ve seen this happening again and again. And we’ve learned how to prevent it.
As a digital product development company, we’ve delivered 200+ projects since 2014, hitting the planned CPI/SPI with only about a 10% variance. We’ve built the processes to turn risks into predictable results, proving that a disciplined software development life cycle (SDLC) works not just in theory, but in practice.
Want to see how a clear SDLC framework can make your software product development process more predictable, reduce risks, and help you deliver on time and within budget?
In this article, we’ll explain why every project needs an SDLC, break down each step and its deliverables, and share the pitfalls we have encountered along with proven practices for overcoming them from our experts.
The Software Development Life Cycle, or SDLC, is a structured process that helps development teams plan, build, test, launch, and maintain software. It organizes the work into clear, repeatable steps so your project stays focused and runs smoothly from start to finish.
At Clockwise, we use SDLC to deliver consistency and transparency in every project we run. But why does it matter so much? Let’s break it down.
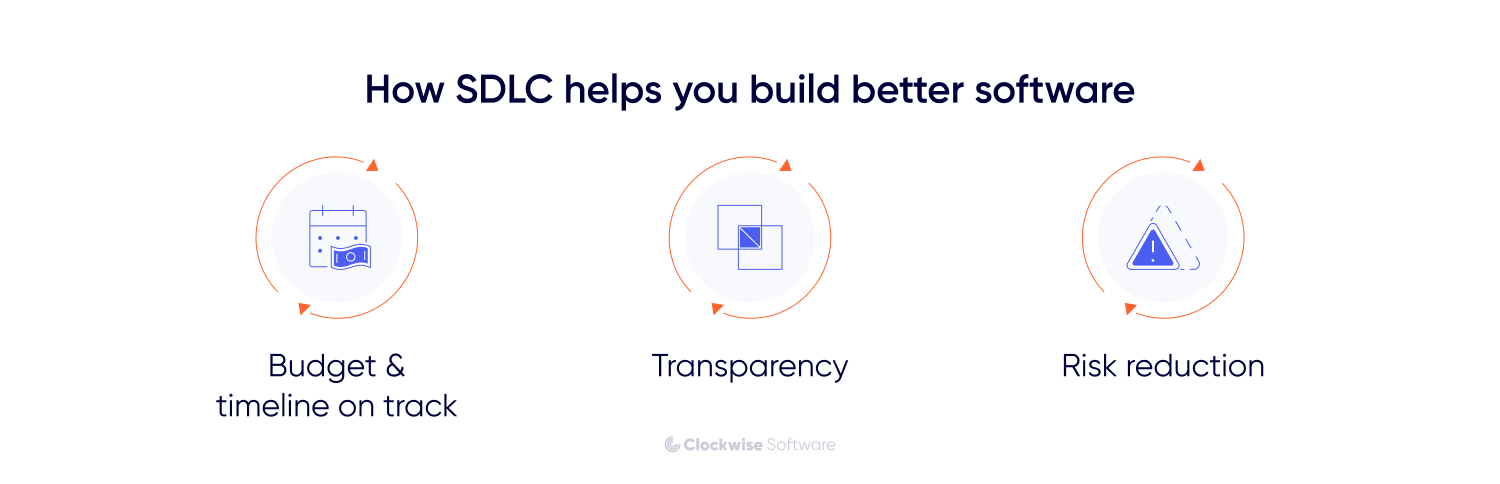
Cost overruns and missed deadlines are the most common concerns for any software project. With SDLC, both are managed together. Each stage has clear inputs and outputs, which prevents scope from expanding without alignment. This structure allows us to keep <10% variance on CPI and SPI across projects.
For the software product development process, this means two things:
Have you ever felt lost during a development project, unsure of what is happening or what comes next? With SDLC, that confusion disappears.
Each stage of the SDLC produces clear, trackable outputs. During pre-development stages (planning, requirements, design), these may include requirement documents, design specifications, and deployment plans. In the development phase, the key deliverables are working features and tested product increments. These measurable results make progress easy to track.
Regular reviews and documentation ensure that it’s always clear what has been completed, what is in progress, and what is planned next. This clarity keeps all team members aligned, prevents misunderstandings, and reduces rework, resulting in faster progress and smoother collaboration overall.
One of the biggest mistakes in software projects is pushing all the risks to the end, when fixing them is hardest. SDLC does the opposite. It spreads risk management across the entire journey.
When following SDLC, we start every project by identifying, categorizing, and planning for risks in a special document - risk register. We track them continuously and, if an issue arises, we already know when and how to handle it before it snowballs into a costly problem.

Risk register is a living document. It evolves constantly throughout the project as we uncover new risks, adjust priorities, and track progress.
Proactive risk management in the SDLC reduces surprises, improves delivery, and saves time by identifying, tracking, and resolving risks early.
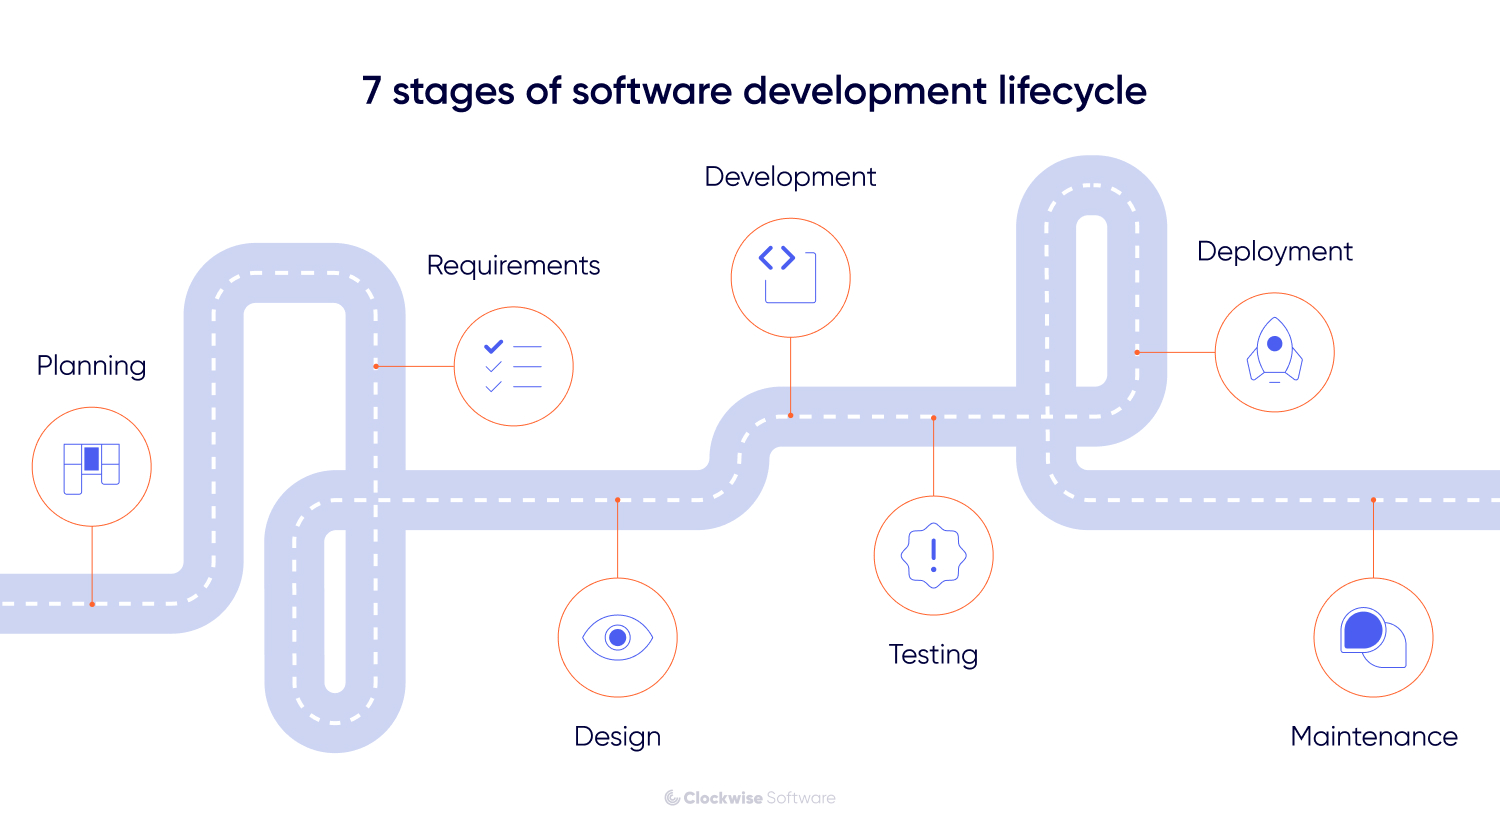
From defining the “why” behind a product to ensuring it continues to grow and improve over time, building software follows a structured path. We break it down into 7 clear steps:
Here’s how the cycle runs, step by step.
The planning stage is where an initial idea becomes a structured, realistic plan. At this point, the project manager, business analyst, and designer work together to define the project scope, objectives, and deliverables.
Here’s what is done at this stage:
The first step in planning is to look at the bigger picture and define what you’re actually trying to achieve. This is where you outline business goals, describe the problem you’re solving, and identify the value your product should deliver to its target audience. This is not about technology yet, but about understanding why the product is needed and what problem it will solve.
At the same time, you need to define specific, measurable objectives and realistic boundaries. Budget, timelines, and regulations may feel restrictive, but they help keep the project grounded and prevent endless scope expansion.
Ask yourself: Who am I building this for, and what impact should it create?
Why you need it: A shared vision and clear problem statement keep the team aligned and focused, ensuring every decision supports the same outcome.
Risks if skipped: Wasted resources, unclear priorities, scope creep, and a product that fails to connect with its market.
Result: Defined goals and constraints that guide the rest of the development process.
Now it’s time to figure out what makes your product special. You need to pin down the qualities that set it apart and turn them into a value proposition. This becomes the anchor for both design and development stages.
If you can’t answer, why should someone pick my product over the competition? Then you are not done yet.
With the big picture clear, you now need to turn it into something practical. That means pulling insights into documents such as a project brief, a business model canvas, and a business plan. These documents give you and your team a single source of truth for goals, resources, and timelines.
Ask yourself: If someone new joined tomorrow, could they get the product vision just by reading these documents?
The deliverables of this stage include:
Documented product vision and business objectives
Defined target audience and problem statement
Clear, measurable goals and constraints (budget, scope, timeline)
Unique value proposition (UVP) and competitive advantage statement
Established a foundation for requirements definition and design decisions
The planning stage should serve as the guiding framework for all subsequent steps, providing clarity, focus, and direction.
So, you’ve done the planning. You know what you want to build and why. Now comes the part where your idea turns into clear instructions for the development team.
At Clockwise, we always start with the user. We map out user journeys step by step, defining how the product should perform to help users achieve their goals easily:
What will they see first?
What outcomes will they expect?
What actions will they take?
Answers to these questions help us uncover the essential features. For each feature, we create two types of requirements:
Both are important: functional requirements ensure the product works as intended, while non-functional requirements ensure it works well in real-world conditions.
Our experience makes this process fast and effective. Because our team has worked on projects across many industries, we know which features usually solve specific problems best. Instead of starting from scratch every time, we bring in proven ideas and tailor them to each specific case.
To capture everything clearly, we prepare documentation that visualizes the logic, data flows, and user experience.
All of this information is brought together in an app requirements document. This is a comprehensive guide that details both functional and non-functional requirements, diagrams, and supporting materials. It is the single source of truth for developers, testers, and stakeholders. This document typically includes the following key elements:
Key stakeholders and their roles – a list of everyone involved and their responsibilities
Project goals – define the project’s objectives and desired outcomes
Market analysis (for PRD) – includes research, user personas, and competitor insights
Risks and limitations – outlines technical or business risks and ways to minimize them
System description – explains main functionality, user roles, and integrations
Functional and non-functional requirements – list all use cases, user stories, and performance criteria
Additional documentation – links to visuals such as flows, diagrams, and architecture drafts
With this document in hand, the development team knows exactly what to build. Now we move on to shaping how it all comes to life: choosing the right tech stack and designing the interface that ties everything together.
During this stage, we focus on shaping both the UI/UX design and the product's technical foundation.
This part focuses on creating a consistent, engaging look and feel for the product. The goal is to make the interface intuitive, recognizable, and aligned with the brand.
Visual identity (UI kit): We start by defining the visual direction: mood boards, typography, color palette, and reusable UI elements. This ensures design consistency across all screens and features.
Interface design: Based on the approved UI kit, we transform initial concepts into detailed layouts, buttons, and interactions that make the product easy and enjoyable to use.
In parallel, our tech specialists ensure the design can be implemented effectively and that the system performs and scales as needed.
Architecture setup: Our engineering team chooses the infrastructure services and tools that support scalability, performance, and smooth integration of all components.
Technical validation and proof of concept (PoC): Before development begins, we verify that the selected technologies and integrations work as intended. This step helps confirm the feasibility and stability of the chosen approach.
Collaboration with developers: Once design and validation are complete, specifications, design systems, and prototypes are handed over to developers, ensuring a seamless transition into development.
Deliverables at this stage include:
UI kit and visual identity: colors, fonts, and components that define your product’s style.
High-fidelity interface design: clickable mockups showing how users interact with the app.
Architecture plan: a clear structure of how the system is built and scales.
Design-to-development package: all assets and specs ready for developers.
Technical validation or proof of concept: tests confirming design and tech compatibility.
At the end of the design stage, you have a blueprint that’s ready to be built.
At Clockwise, we run pre-development (all 3 steps we just described - planning, requirements, and design) as a part of the discovery phase. Discovery is, basically, the "starter pack" for your product journey. Discovery lays a strong foundation for your product and can save you up to $30K before the development phase even starts.
We’ve shaped our discovery approach from years of hands-on experience. The goal is always the same: help you define and plan all the details needed for development.
Discovery is our way to:
During discovery, we tailor the process to your specific project, ensuring you get everything you need to start development smoothly. The exact deliverables may vary, but here’s what we usually create at this stage:
In the simplest package, you’ll usually get:
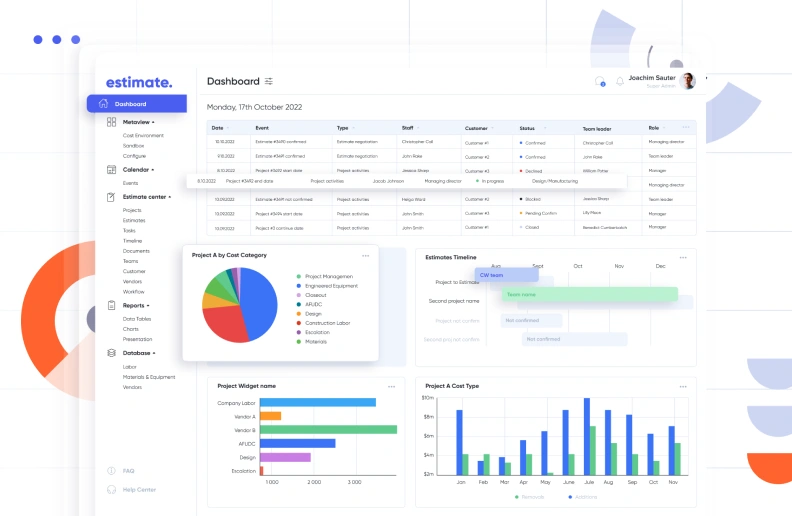
Let’s see how this works in practice. One of our clients, a cost-estimation platform owner, approached us with an idea to pivot the product, making it richer in features, more user-friendly, and more secure.
We kicked off a 3-month discovery phase, and created 11 deliverables (feature breakdown structure, SWOT analysis, risk assessment & mitigation plan, etc.). By the end, our client had everything he needed to pitch to investors and start the development process.
So, if the basic planning stage focuses mainly on elaborating the development plan, discovery can provide you with the development plan, project requirements specification, and UI/UX design blueprint, with which you can proceed to the technical part.
Now it’s time to turn plans into working software. Basically, this is the construction phase: you’ve already drawn the blueprint, and now you’re laying the bricks.
At Clockwise, we usually begin with a minimum viable product (MVP). Why? Because it’s the smartest way to test an idea without burning through time and money. An MVP helps you enter the market quickly and validate your core features or idea, ensuring they actually solve the problem before you scale.
Take our Attention Nest project as an example. The client needed something running as soon as possible. With requirements and a plan in hand, we could confidently prioritize the features that mattered most for the MVP and deliver a functional product quickly, while still keeping the long-term roadmap in mind.
At this stage of the SDLC, the goal is to turn all documented requirements into a working, testable product. Here’s what the MVP development process usually looks like:
Before writing features, we run a prep work session to set up the development environment. This makes the whole process smoother and helps avoid issues or rework later on. Bootstrapping includes:
Once this stage is done, the team has a solid foundation to build on.
This is where the app starts to look and feel like the product you envisioned. Frontend developers bring the UI/UX design to life by:
As a result, your product stops being just code and starts becoming something people can actually interact with.
Behind the scenes, backend developers ensure your app’s brain is functioning properly. This stage covers:
Our backend specialists also monitor performance, ensuring the system can handle peak loads without slowing down.
Within the SDLC framework, this development phase is where the product truly takes shape, transforming ideas and designs into a functional, test-ready application.
Throughout the SDLC, we rely on the Agile methodology. It allows breaking development into bite-sized sprints instead of trying to deliver everything at once. Each sprint lets us roll out improvements, prioritize the most valuable features, and adjust if your priorities change.
For projects with dynamic requirements, Agile is irreplaceable. It gives the team room to adapt without losing momentum, so changes feel like part of the process instead of a setback.
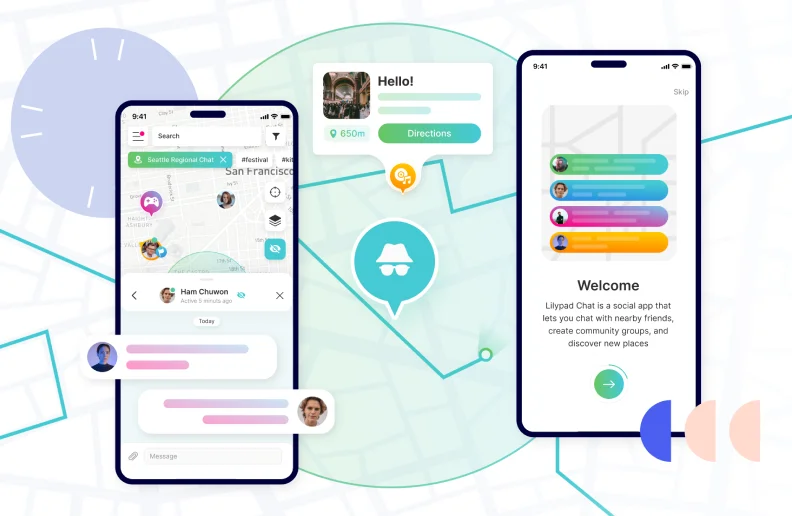
Take our Lilypad project. The original idea seemed straightforward: integrate Lilypad Chat with the Geocaching app. But as development moved forward, the customer’s priorities changed. Because we were working in Agile sprints, our team could adapt the functional requirements and still deliver exactly what the client needed. Without Agile, those changes would’ve been disruptive; with Agile, they became a natural part of the process.
In SDLC, testing acts as the safety net that protects your product, woven into every step of development. You need to know whether each part of your system works, whether the parts play nicely together, and whether the whole product still holds up after changes.
So, when does testing start? As soon as development begins. And with a clear process, it stays focused and effective. Here’s the cycle we follow:
At the start, QA leads and the product team define which testing types fit each stage: from unit tests during sprints to integration and regression testing later on. This roadmap helps us stay aligned and proactive.
Our QA engineers create detailed test cases, scripts, and checklists, often supported by mind maps for complex flows. This documentation ensures nothing slips through the cracks and gives us reusable assets for future testing cycles.
We configure test environments that mirror real usage. This includes staging areas for sprint work and shared environments where we run regression tests after each code deployment.
During each sprint, developers write and run unit tests for new features to confirm that every component works correctly. When multiple parts connect, we switch to integration testing to ensure everything communicates as expected. Once those updates are merged into a shared build, we run regression tests to verify that nothing else breaks.
When something doesn’t behave as expected, we log it with clear steps and visuals. Developers then work on resolving the issues.
Once fixes are implemented, our QA team re-tests the scenarios to confirm they’re resolved. We then run regression suites to make sure nothing else was unintentionally broken. This step keeps the product stable, release after release.
Before release, we collaborate with business stakeholders or end users to perform UAT, confirming that the product not only works technically but also meets real-world expectations.
Each cycle ends with a summary of what passed, what failed, and what’s improving. This transparency helps the team adjust testing focus and plan smarter for the next sprint.
Testing throughout the SDLC ensures that, by the time development transitions to deployment, your product is stable, reliable, and ready for real users.
This is the final active stage of the SDLC, when the tested product moves into a live environment. However, deployment isn’t a final push-and-done step. Even after UAT, we run additional checks to make sure everything holds up before real users get access. Once we’re confident, we move the product into production and set up monitoring to track performance, catch issues early, and respond quickly if something comes up.
For mobile apps, deployment also includes the publishing process: preparing store assets, meeting Google Play and App Store requirements, and guiding the release through approvals.
At this stage of the SDLC, the focus shifts from development and testing to stability, monitoring, and continuous improvement.
By approaching deployment this way, you end up with platforms that are stable, responsive to change, and shaped around how people actually use them.
Releasing a software product marks the start of its life with users. From this point, feedback arrives, new requirements appear, and areas for improvement become visible.
The focus in this stage is on stability, reliability, and continuous enhancement. APIs evolve, bugs need attention, and user expectations grow over time. Once people start interacting with your product, their feedback shows what’s working and what needs adjustment. To manage this, we use a feature matrix to prioritize changes, ensuring updates deliver real value rather than just filling the backlog.
In general, at this stage, our team concentrates on the next tasks:
Monitoring performance and resolving issues quickly
Refining user experience based on real usage data
Updating integrations when external services or pricing change
Adding features that support new business goals or campaigns
Running experiments like A/B testing to validate ideas
After release, the SDLC process doesn’t end; it starts again. You watch how the app performs, plan new features, implement them, test, and deploy. That’s why it’s called a development cycle: each iteration builds on the previous one, turning the product into something more polished, reliable, and valuable over time.
Over the last decade, we’ve seen nearly every challenge that can derail a software project. Many of those challenges are not unique, and they’re the same pitfalls that teams across the world face during SDLC.
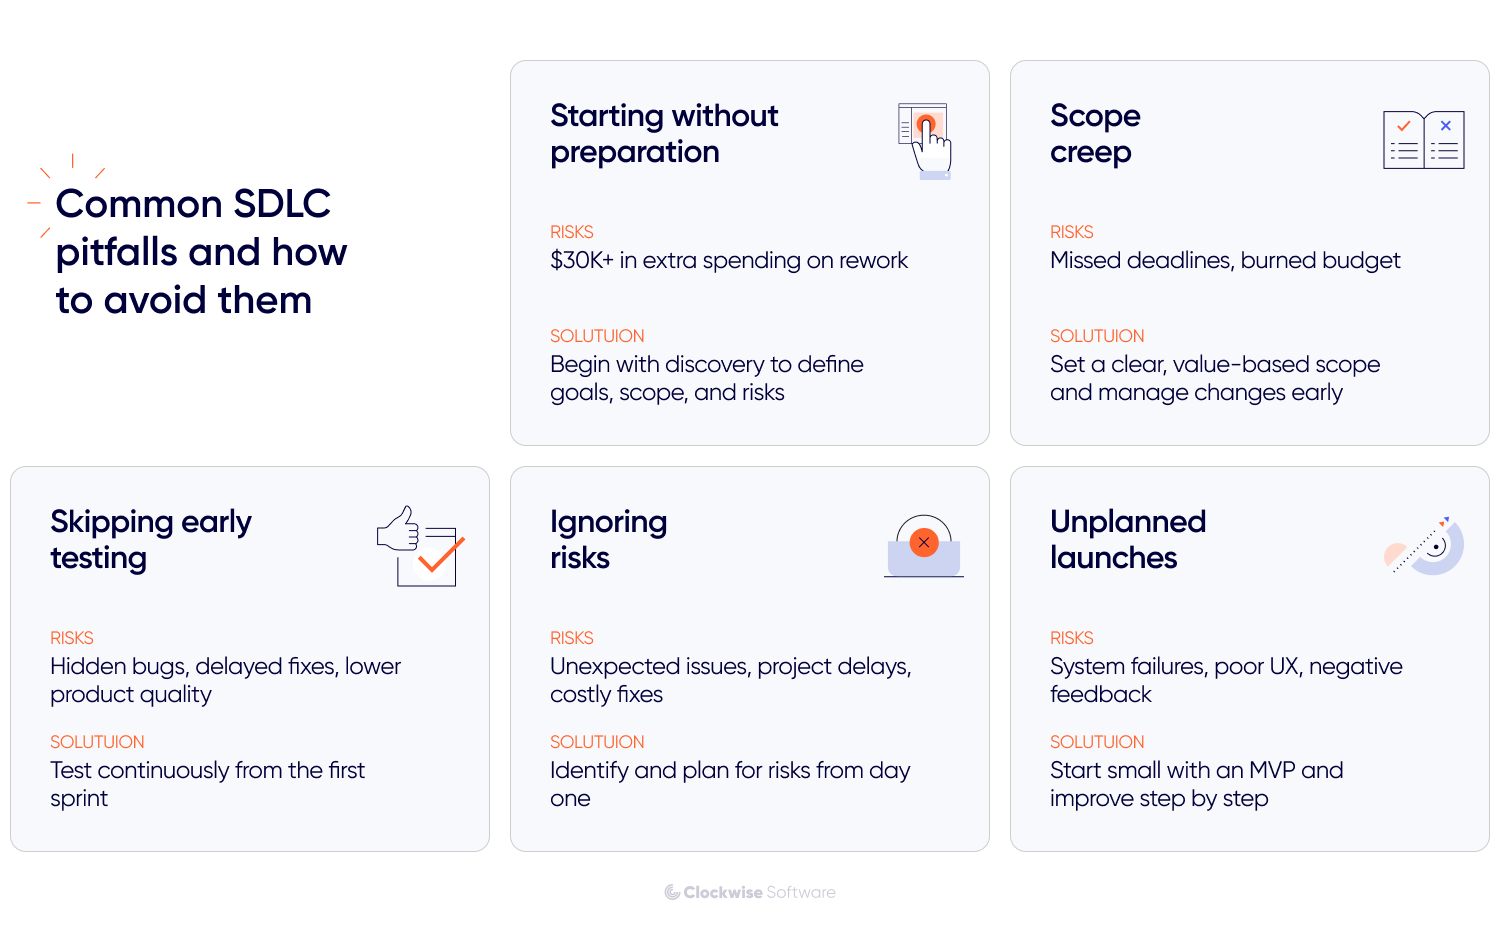
Here are the most common mistakes and the practices we’ve put in place to ensure our clients don’t fall into them.
The pitfall: Projects that jump straight into coding without structured planning and analysis often struggle with vague goals, unclear scope, and spiraling budgets.
Our approach: Every project we start includes a discovery phase. In a matter of weeks, we work with stakeholders to clarify the vision, define functionality, document architecture and integrations, identify and assess risks, and elaborate on both positive and negative scenarios. This process keeps scope under control and sets realistic expectations for time and cost.
In our SMM platform project, we faced such a problem: a big vision but a limited budget. We ran a discovery phase: clarified must-have features, mapped integrations with each social network’s API, and defined architecture. That allowed us to propose a pragmatic solution: a monolith that emulated microservices rather than rebuilding the entire architecture from scratch. This way, we made the platform scalable without overspending. If we run straight to development, we wouldn't be able to fulfill the client's requirements without exceeding the budget.
The pitfall: Without well-prioritized requirements, teams waste time building features no one actually needs. Scope creep sneaks in, deadlines slip, and frustration grows.
Our approach: We create a product blueprint that includes a clear scope and prioritized requirements. Business value drives those priorities. This way, the team can stay focused on features that matter most and maintain delivery predictability.
A project is a living thing; change is often a part of it. We need to keep plans flexible. That’s why we discuss the scope and risks with you up front. If there’s a high chance of shifting priorities or scope changes, we flag it as a risk and may add buffer time when it makes sense.
In our Creadoor project, the initial feature list came in at nearly 1,200 hours, far beyond what the budget allowed. We worked with the founders to cut scope to an MVP of about 400 hours, focusing on critical flows such as project posting, bidding, chat, and payments. By resisting scope creep early, we shipped a viable platform fast, then iterated.
The pitfall: Some teams test only at the end of the development cycle. That’s when bugs are most expensive to fix, and it’s the fastest way to derail a release plan.
Our approach: Testing is always a part of our software product life cycle from the very first sprint. We follow a structured software testing lifecycle: test planning, test data preparation, execution, and tracking. This allows us to catch issues early and deliver work that’s accepted the first time.
The pitfall: Risks around budget, technology, or team performance are often underestimated until they turn into real blockers.
Our approach: We surface and classify risks at the start, and mitigation steps go directly into the project plan. This approach has helped us maintain predictable budgets and schedules across complex projects.
For example, while conducting discovery for a cost estimation platform, we spotted several big risks early on. Construction companies had different ways of calculating estimates, integrations with third-party tools looked complex, and the system needed to handle real-time data updates without slowing down.
We built early prototypes and tested our ideas with pilot customers to see what worked in practice. This helped us cut uncertainty on both the technical and business sides. The MVP scope became realistic, the risks dropped, and the client saved months of work that would’ve gone into building features no one needed.
The pitfall: Rushing to release without clear preparation steps often leads to unstable launches, frustrated users, and costly rework.
Our approach: We plan each release carefully. The team defines what needs to be tested, approved, and ready before going live. We start with a small MVP release, gather real feedback, and then improve the product step by step. This approach keeps launches smooth and helps new products gain traction faster.
By identifying the patterns behind failed launches and establishing clear processes to avoid them, we’ve learned how to keep projects predictable and products scalable. These practices turn chaos into progress, and they’re why many of our clients stay with us long after the first MVP is live.
Following the SDLC means working within a structured, predictable, and efficient process in which every stage has a clear purpose and delivers real value to the product. It’s about seeing each stage as a chance to build a stronger product, not just a box to check before moving on. Planning defines direction, requirements provide clarity, design gives shape, development builds function, testing secures quality, deployment delivers value, and maintenance sustains growth.
When these stages work in sync, development becomes smoother, risks shrink, and the whole process feels more predictable and under control. Instead of reacting to problems, teams can move forward with focus and confidence, knowing that progress is guided by structure.